The word tamal comes from the Nahuatl tamalli which means wrapped. This delicious dish is of indigenous origin, prepared with cooked corn dough and wrapped in leaves of different plants (banana, corn, maguey, among others). Stuffed with vegetables, chili, sauce, meat, chicken or fruit, sweet or savory, for all tastes! Tamales are the most popular among Mexicans.
They say there are between 500 and 5,000 different tamales across the country. Can you imagine all those flavors?
It is a delicious part of the Mexican traditional dishes, In Mexico we eat them on many important occasions, like the Day of the dead, when life and death are celebrated, tamales are put on altars as offerings to the dead and enjoyed in the company of our loved ones. We also celebrate Candlemas day; On February 2, the person who receives the Baby Jesus figurine in their Rosca de Reyes needs to invite everyone for tamales.
These are some of the tamal varieties from all over Mexico, the possibilities are really endless, they estimate that per year the production and sale of tamales around the country is in the hundreds of millions!
Holiday Tamales Recipe
Ingredients:
- Tamal leaf
- Tamal Flour Maseca 1kg
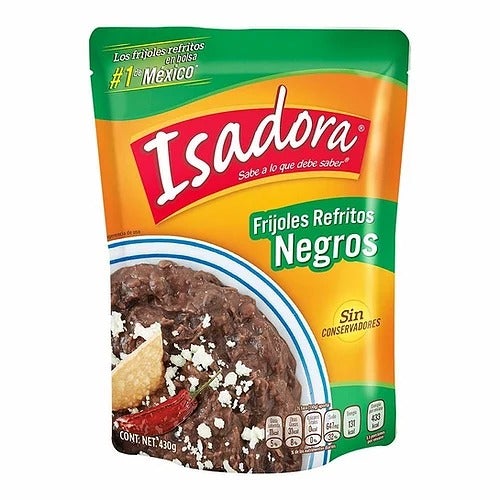
- Isadora Beans
- Rajas Jalapeño
- If you chose the filling rajas con queso: 200 gr of white cheese (we recommend queijo flamengo, gouda or mozzarella)
- 4-5 cups of chicken or vegetable broth
- 2 cups of shortening veg or pork lard, you can also sub with a cup of oil
- 1 tablespoon of baking powder
- 2 liters of water
- Fine Salt
Equipment Needed
Below is the list of tools needed to make the recipe,
- 1 large tall stockpot (for steaming the tamales)
- Steamer basket
- 2 large bowls
- Electric Mixer (optional for whipping the shortening/lard)
- 1 small pot (for making broth)
- Measuring cups and spoons
- Cutting board
- Knife
Prep for Tamales:
Step 1: Soak the corn husks tamal leaf
Rinse the corn husks to remove any debris, then place into a large bowl and cover them with cold water. Let them soak for at least one hour.
Step 3: Prep your broth
If you’re making fresh broth, please prepare before hand, if you’re making broth from bouillon cubes make sure its cool to touch by the time of the workshop.
Step 2: Whip your shortening or pork lard
Make sure the vegetable shortening or pork lard is at room temperature for easy handling, the traditional way to whip the shortening/lard to achieve fluffy tamales is to do it by hand which takes 10-15 minutes, but to simplify this step use an electric mixer on medium to high speed for around 2-3 minutes. If you don’t have an electric mixer, you can whip the shortening/lard by hand, the technique is to melt it with the warmth of your hands, by squishing it and tossing it back on the bowl, repeat this for 10-15 minutes. The shortening/lard should look white, light and creamy, adding volume to the shortening/lard will yield a lighter masa for tamales.
Make the Tamales!
STEP 1: MAKE THE DOUGH
Measure out two to three cups of broth, set the whipped shortening, pork lard, or oil on your workspace and in a large bowl, put 3 cups of the tamal flour, with your hands gradually alternate between adding the shortening and the broth. Mix until the masa is uniform and light, the texture should be that of a thick cake batter.
Pro tip: For a foolproof dough, there is a float test! Take a small chunk of your dough and drop it into a cold cup of water, the dough should float, if it doesn’t you have to keep working it!
STEP 2: PREP YOUR FILLING
Today you had two options for filling, Rajas con Queso and Beans with chipotle.
For the rajas con queso, we have provided you a can of rajas which already comes cut in strips, please drain and properly shake out the water, we don’t want soggy tamales.
For the beans and chipotle, open the packet of beans and put the beans in a small bowl. Open the can of chipotle, take out the chilies in the chipotle can and cut them into manageable strips to add to your tamales.
STEP 3: ASSEMBLE THE TAMALES
Drain the tamal leaves that have been soaking for the last hour, and pat them dry, then we will fill them assembly line-style:
- On the wide end of the husk, with a spoon spread 3 tablespoons dough to within 1/2 inch of the edges
- Top each with 2 rajas and 1 strip of cheese OR 2 tablespoons of beans and 1 strip of chipotle
- Fold the long sides of the husk over the filling. Make sure they overlap slightly for a secure closure
- Fold the narrow end of husk over
- Tie with a strip of husk to secure
- Repeat until all of the husks are filled and secured
Pro tip: Treat your spoon like a paint brush and your filling like the paint on the corn husk, put the leaf up to the light and if there are noticeable gaps on the leaf not covered by the dough then you need to cover those. In my family we don’t like to make fat tamales, so a thin even layer of dough on the leaf is optimal.
STEP 4: STEAM
Place a large steamer basket in a your stockpot over 1 in. of water. Place the tamales upright in the steamer and cover with remaining tamal leaves. Bring the water to a boil. Let them steam, covered, for 45 minutes to an hour.
Pro tip: This is a long steam, and water level will drop as the water boils off. Be sure to check on the water frequently, add more water as needed. You don’t want the pot to boil dry; this can damage the pot and makes for sad tamales. Mexican grandmas sometimes put a coin at the bottom of the pot so that it rattles when the water is getting low!
To see if they are cooked take one tamal out let it cool for 5-10 minutes and if the dough peels away cleanly from the leaf its ready, if the dough is still soft steam for another 15-20 minutes.
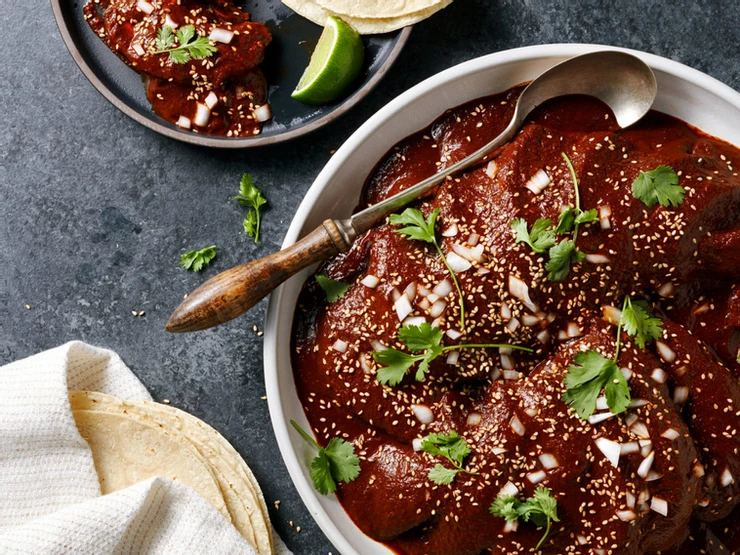
Tamales of the variety that we’ve just made can be served with salsa on top or sour cream, you can also enjoy these for breakfast with a fried egg on top!
To reheat them, place them in a plate still wrapped in their corn husk in and microwave for 2-3 minutes or take them out of their corn husk and lightly fry them on a pan, they will develop a crunchy exterior!
Pro tip: Uncooked tamales can be frozen for later, just be sure to pack them tightly in freezer bags before freezing. To serve, thaw in the refrigerator overnight, and then steam for for 45 minutes to an hour.